WinCE Tutorial - 7 - Running WinCE under Virtual PC - 3
WinCE Tutorial - 6 - Running WinCE under Virtual PC - 2
Debugging
After establishing a connection between development image Visual Studio and WinCE test image, it is relatively easy to use debug facilities. In the following sections, an example Hello World application debugging and an example network driver (passthru) debugging will be explained.
User Mode Program Debugging
-
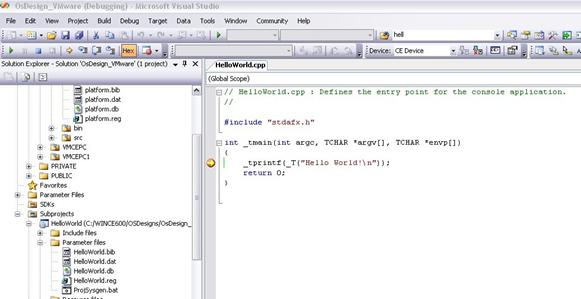
Create a new Hello World subproject to your solution (File → New → Subproject, WCE Console Application, A typical “Hello World” application).
-
Right click to your OSDesign and select “Build All Subprojects”. After building the subproject, Platform Builder will automatically create a new NK.bin.
-
Upload this new NK.bin to the test system. After WinCE boot, you can open the source code and set break points. To start the program, you have two options. The first one is starting the application directly from WinCE. HelloWorld.exe is normally located at Windows directory. To see the file, you first need to change the directory settings to see hidden files. The second option is running the application from Visual Studio. From Target → Run Programs you can see all programs currently available in WinCE. Select HelloWorld.exe from there and hit the Run button.


Kernel Driver Debugging
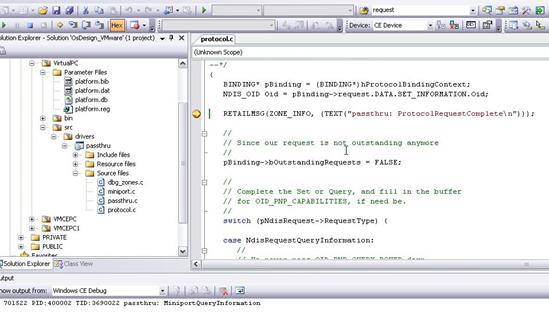
Passthru driver located under $(WINCEROOT)\PUBLIC\COMMON\OAK\DRIVERS\NETSAMP\PASSTHRU will be used as an example.
-
Copy the entire directory under
$(WINCEROOT)\PLATFORM\VirtualPC\SRC\drivers. Create SRC and drivers directories. Create dirs files under src and drivers directories.
Src directory dirs file content:DIRS= \ drivers \drivers directory dirs file content:
DIRS= \
   passthru \
Modify the
$(WINCEROOT)\PLATFORM\VirtualPC\dirsfile by adding src directory as a line. -
Change the
$(WINCEROOT)\PLATFORM\VirtualPC\FILES\platform.regfile and add the following line:
#include "$(_TARGETPLATROOT)\src\drivers\passthru\passthru.reg" -
Change the
$(WINCEROOT)\PLATFORM\VirtualPC\FILES\platform.bibfile and add the following line:
passthru.dll $(\_FLATRELEASEDIR)\passthru.dll NK SHK -
Enable KITL and kernel debugger from the project Build Options.
-
Rebuild the solution and load the generated NK.bin image to the test system.
-
In output window, you will start to see the passthru driver messages.

-
You can also set breakpoints to your code.
Note: Sometimes the breakpoints do not become active although the dll is loaded. In this condition, starting a command line instance in WinCE magically solves the problem.
This was the last part of the WinCE tutorial series. I hope you enjoyed it!